Our friends at Pixelbuddha are experts at creating first class design tools: Photoshop effects, logo mockups, photo effects, glitch effects, overlays, textile mockups, brushes, map creators, and more. In this special feature, Pixelbuddha presents a tutorial where you’ll create a poster design with shattered, glitch text effect.
First, let us shed some light on the concept of displacement maps for Adobe Photoshop, contributing largely to all sorts of distortion effects for warping objects, texts, or photography. A displacement map is basically the textured layer, which makes the graphics borrow the same texture when applied: if you’re dealing with a displacement map replicating crumpled paper, then the photo you use with it will have the same wrinkles. In order to create a displacement map, it’s required to have an image with texture, switch it into black and white tones, adjust the contrast, and save in a displacement map format.
Thankfully, you can download Chromatic Glitch Text Effect from our Photoshop Actions section, which contains multiple glitch maps for a convenient and easy workflow!
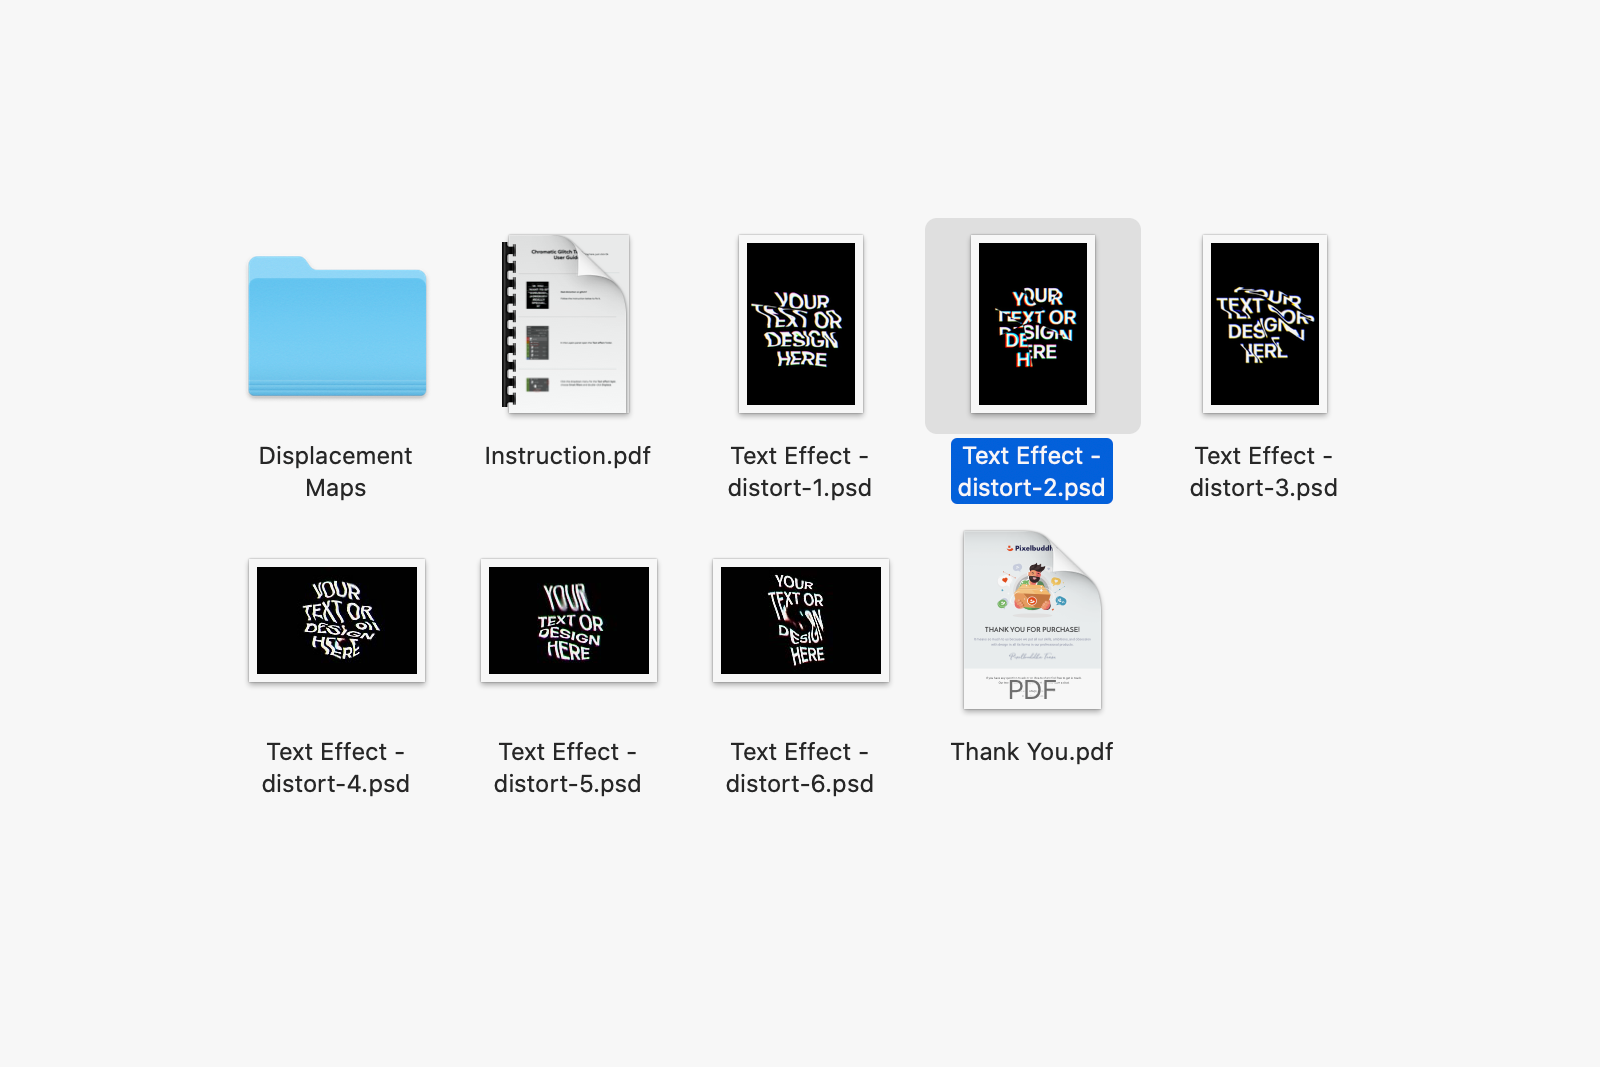
Step 1: Open the downloaded Chromatic Glitch Text Effect folder, which contains 6 PSD files with different glitch text effect styles packed into various artboard orientations. We picked a vertical Adobe Photoshop file (PSD) with a smashed glass screen effect for the future poster design.
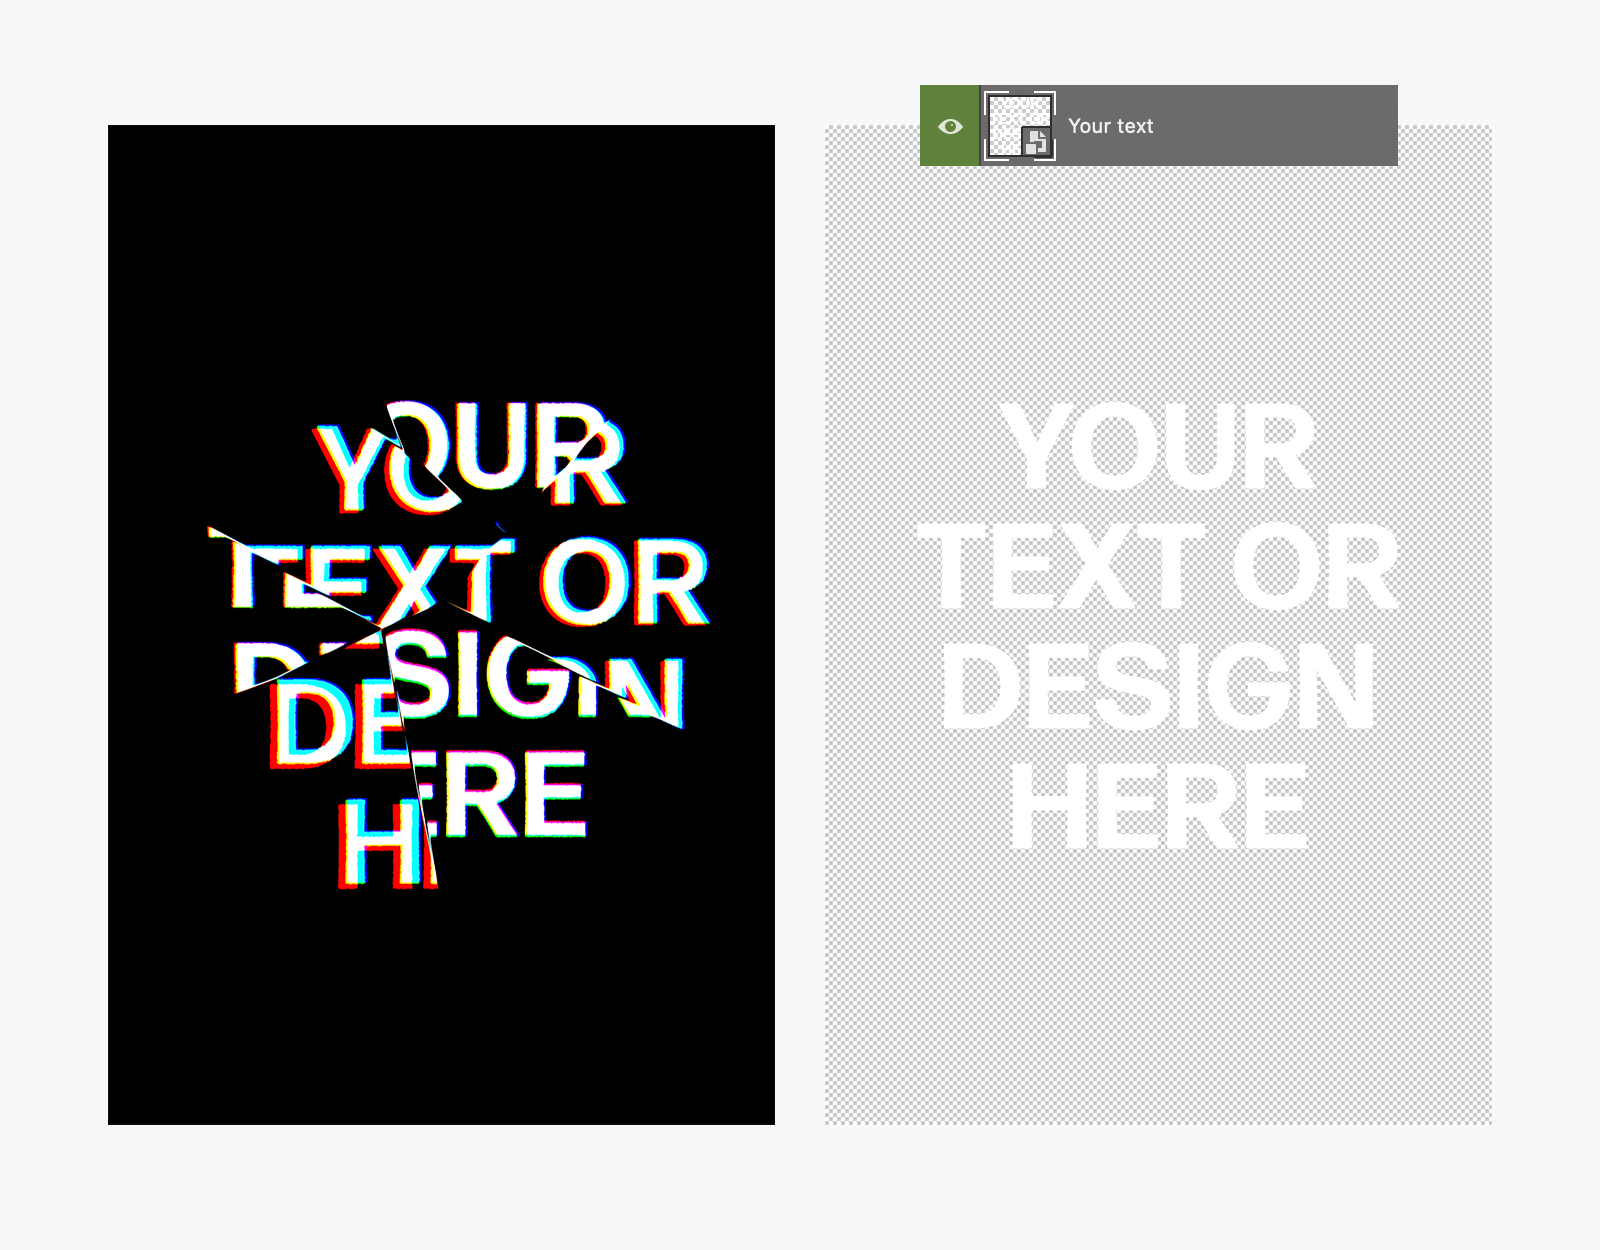
Step 2: The file is created with a Smart Object Layer. It contains the same image settings as the source layer, but allows non-destructive file customization. This layer is marked green in the current file and is called, “Your text.” To open the Smart Object Layer, you need to double click its thumbnail (not the layer itself). Clicking the Photoshop layer triggers the other settings that we are not planning to use for this tutorial.

Step 3: Here’s the new popped-up layer you need to edit by typing the required text. But first, delete the “Delete Me” layer used for presentation purposes.
The choice of typeface is always important, as script and display fonts won’t look as impressive compared to sans serif or serif typeface. Keep in mind that the source PSD is wrapped around moving and twitching lettering, so this stage of the editing process is entirely artistic.
Play around with the size and spacing between the letters to make the deformed text look like you want it to. When the preparations are over, close the Smart Object Layer and click “Save” in the appeared window. Alternately, you can save the changes by using Cmd+S or Ctrl+S hotkeys.
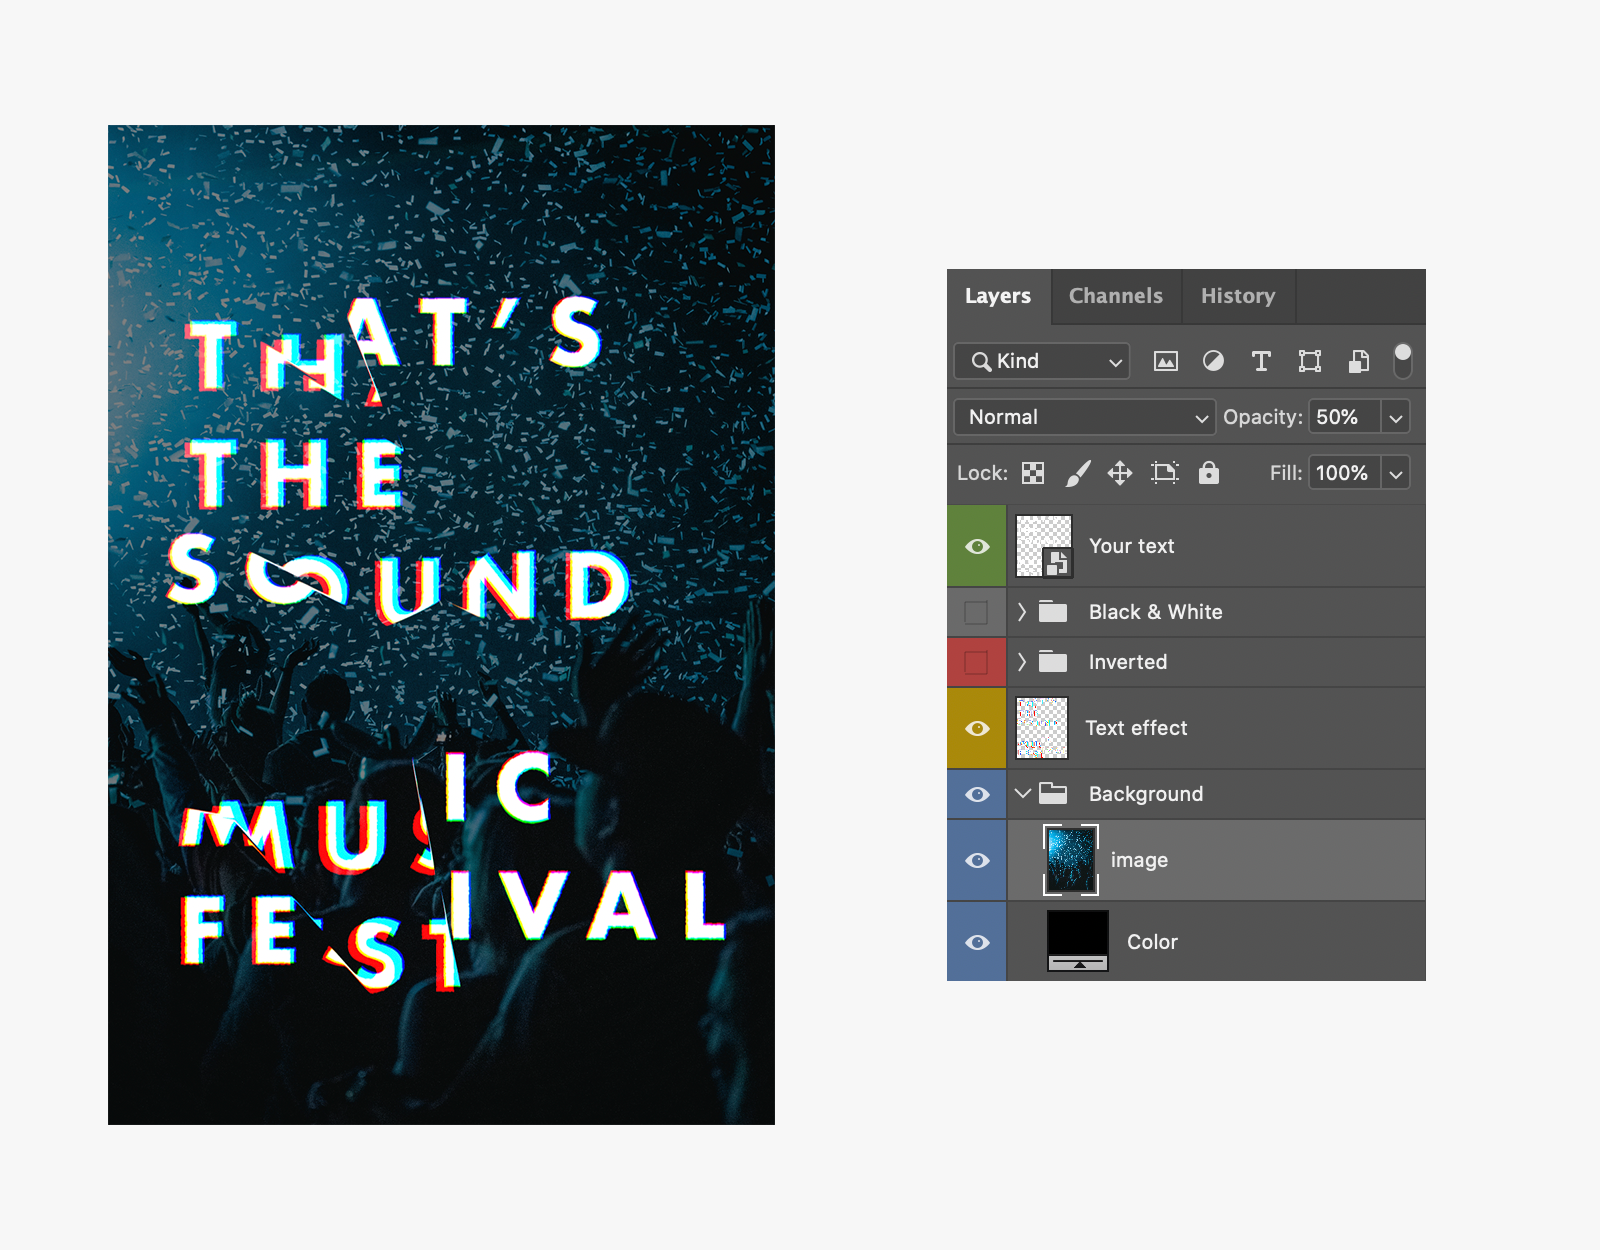
Step 4: You get redirected to the main tab with the applied effect. Now locate the yellow-marked “Text effect” folder, right-click it and select “Merge Group” command for further glitch text effect customization.
Taking care of the background image, you need to have a downloaded photo or illustration. Click the Background blue-marked layer to select it, then drag and drop the image. Name the layer “image,” right-click it and pick “Rasterize Layer.” The opacity should be set to 50% on the layer’s settings menu.
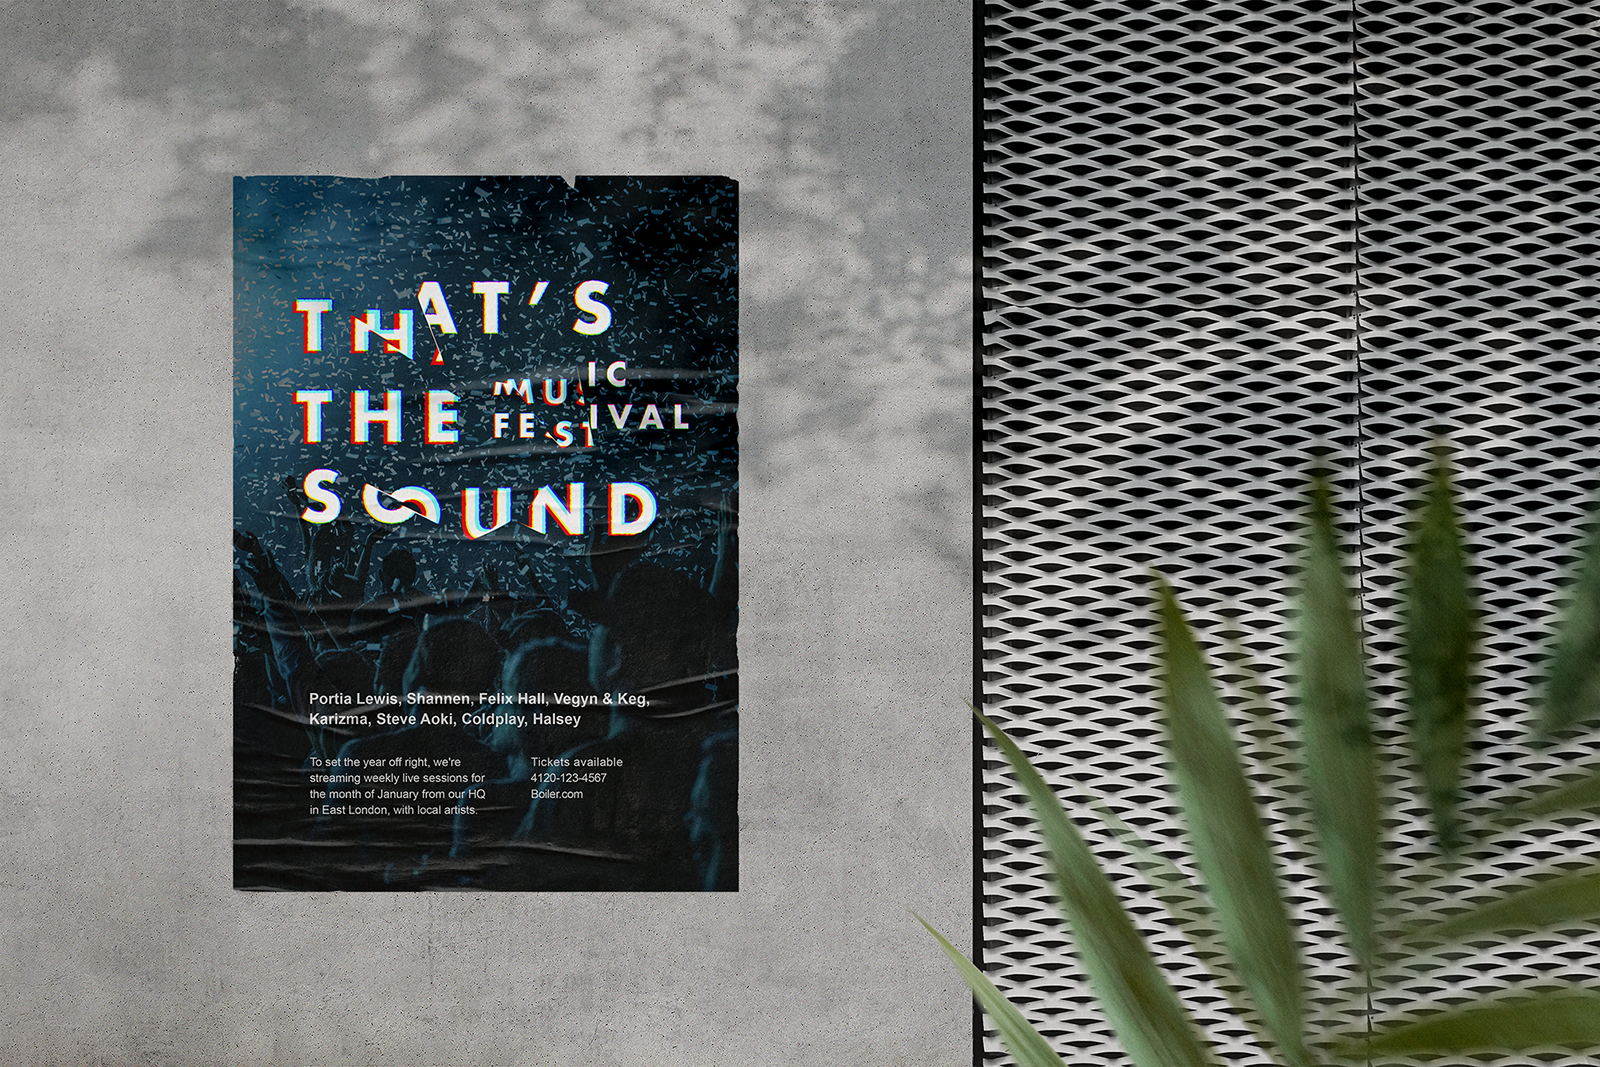
Step 5: The typeface part with the applied glitch text effect gets presented in one raster layer called, “Text Effect.” You can cut the layer in themed broken glass-like pieces by selecting the parts via the Rectangular Marquee Tool, then right-clicking them, and using the command “Layer via Cut.” Afterward, scale the cut parts and move them around for a better visual typographic composition. You’ll notice how the poster parts obtain more expression while leaving some space for other additional information—in this case, it’s the performing artists and ways to get tickets for the show.
Voila, your poster is ready! If you need some fabulous presentation mockup scenes to put it in, we have hundreds of stock graphics to help you out.
Chromatic Glitch Text Effect, a product and tutorial brought to you by Pixelbuddha. We hope you enjoyed it and found it useful.


